Mitigation is a generic term to indicate an activity, a pattern or some software that has the intent of reducing the risk caused by some Threat.
Mitigations can be grouped accordingly with a Control Type, which describes when the Mitigation is effective and how it operates. The following Control Types are supported by the Threats Manager Platform.
| Name | Description |
|---|---|
| Preventive | Reduces the probability or impact of the threat event. It buys time for the defenders and forces the attacker to make more actions that may be detected. It is also called Preventative. |
| Detective | Detects an attack while it is in progress. |
| Corrective | Responds to the attack, limiting the damage done. It is sometimes called Responsive. |
| Recovery | Recover from the damages occurred from an attack. A typical example is restoring from a database. |
| Deterrent | Convinces the potential attacker that the cost for her may be higher than the potential gain. |
| Other | Other types of Security Controls. |
Tips & Tricks
Mitigations belonging to different Control Types have different roles. A Preventive Control would delay the attacker, but it would not stop a determined adversary. For this reason, you need to combine Mitigations belonging to Multiple Security Controls. This consideration is in line with the Security Principle known as Defense in Depth.
Mitigations can be linked to Threat Types and Threat Events, with different meanings, discussed below.
Standard Mitigations
Mitigations can be associated with a Threat Type. When this occurs, the associated Mitigation is considered a Standard Mitigation for the said Threat Type, and as a result, it is a recommended Mitigation for Threat Events derived from the Threat Type.
Standard Mitigations are represented by objects called Threat Type Mitigations, which act as logical links between the Threat Types and their Mitigations. Those objects have an additional information, the Strength, which can assume one of the following values:
- Maximum, which indicates a mitigation that could be considered strong enough to make the residual risk for the Threat Type negligible, even when it is not combined with other mitigations.
Bottom line: Maximum Strength should be used sparingly, for those situations that are clearly addressed by the Mitigation, like Backup for a Threat like “Data can be destroyed irrevocably due to lack of a tried backup strategy”. - Strong should be used for Mitigations that are almost but not quite enough for making the residual risk for the Threat Type negligible.
- Average, which is to be used for Mitigations that have a significant impact on the Threat, but not so much as the Strong ones.
- Low should be used for Mitigation which have some effect, even if minor.
- Negligible is thought for being used for Mitigations that have an extremely limited effect on the associated Threat Type.
Bottom line: it is typically used for Mitigations that are thought to have an effect, to indicate that in reality that effect is minimal. Avoiding to associate the Mitigation would not do, because it would not be possible to discriminate between this situation and one where you would not have included the Mitigation because you haven’t thought about it.
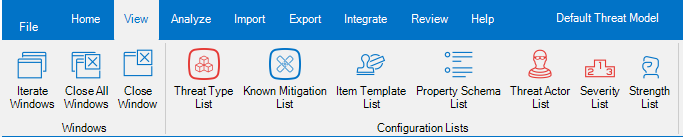
Known Mitigations can be edited from the Threat Type List or from the Known Mitigation List, in the View ribbon.
To create a new Mitigation, open the Known Mitigation List, then click the Add Mitigation: this will open a dialog where you will be asked to insert the name of the Mitigation, optionally a description and its Control Type.
It is also possible to create new Mitigations when you associate it to a Threat Type: in this case, the creation of the Mitigation will be contextual to the creation of the Threat Type Mitigation.
Tips & Tricks
Given that Threat Type Mitigations are only links to Mitigations, you cannot edit the underlying Mitigation from a Threat Type Mitigation shown in the Threat Type List or in the Known Mitigation List. To do that, you have to click on action Edit the underlying Mitigation, which will open an Item Editor dialog on the underlying Mitigation.
Threat Event Mitigations
Mitigations can be associated to a Threat Event, to indicate what can be done, has been done or has been planned for addressing the Threat Event.
They are represented by objects called Threat Event Mitigations, which act as logical link between the Threat Events and their Mitigations. Those objects have two additional pieces of information:
- the Strength, which have a similar meaning to what has been discussed for the Standard Mitigations;
- the Status, which indicates if the Mitigation is already present or not.
The Mitigation Status can assume the following values:
- Existing, which indicates a mitigation that already exist, when the Threat Model is performed.
- Proposed, used to indicates new Mitigations you are proposing, as a Threat Modeler.
- Implemented, which is used for existing Mitigations which have been introduced as a consequence of your Threat Model.
Bottom line: if you are doing the Threat Model as an iterative effort (for example, as part of Scrum Sprints), then you may recommend a Mitigation in Sprint N as Proposed; then it could be implemented during Spring N+1, and you could change the status to Implemented as part of your refresh done in Sprint N+2. - Approved, to indicate a Mitigation that is known (for example it is tracked in the Backlog), but it has not been planned, yet.
- Planned is to be used for Mitigations that are known and have been planned for implementation.
Bottom line: Planned Mitigations require to specify an availability date.
Tips & Tricks
There is an additional Mitigation Status: Undefined.
It is very important to ensure that no Mitigation has been assigned he Undefined status at the end of the Threat Model, because this may prevent the Mitigation to be visible in the generated reports.
Threat Event Mitigations can be edited from the Threat Event List or from the Mitigation List, in the Home ribbon.

To create a new Threat Event Mitigation from an existing or new Mitigation, you can select the Threat Event and then click the Add button in the Item Editor: this will open a dialog where you will be asked to specify the Mitigation to be associated, or insert the name of the Mitigation, optionally a description and its Control Type and Mitigation Status.
Tips & Tricks
Given that Threat Event Mitigations are only links to Mitigations, you cannot edit the underlying Mitigation from a Threat Event Mitigation shown in the Threat Event List or in the Mitigation List. To do that, you have to click on action Edit the underlying Mitigation, which will open an Item Editor dialog on the underlying Mitigation.
